Thursday, 10 October 2013

All the fun, without the (pizza) bun.

During a trip to the high street last week, for a bit of non-essential spending, I was alerted to something that made my skin crawl. Anyone whose read my blog before will know that I’m definitely not a pizza snob. I’ve had more than my fair few slices of dirty pizza, some so bad that the Italians would consider revoking my entrance into their wnderful country. But THIS (what can only be describe as a pizza mutilation) THIS really pushed me over the edge. It was Pizza Hut’s latest offering, the cheeseburger pizza crust.  I mean, Jesus, the over styled picture doesn’t even do it any favours, can you imagine  what it looks like in real life? If anyone has actually dared to tried this beast, and wants to prove me wrong, I’d love for you to get in touch. Surely I can’t be alone here, can I?? Even there smug slogan makes me feel nauseous. “All the fun without the bun.” I would have loved to be a fly on the wall for that moment of creative marketing genius…

That said, me and bread do have a bit of a problem, the problem is I can’t stop eating it. Similarly I seem to have this problem with pizza too, hardly a shocker really seeing as the main element to a pizza is dough. I had an idea for these cool little pizza buns when I was hungry the other day so decided to give them a go and guess what…..THEY. ARE. AMAZING. Having said that they are highly addictive, I can’t promise you that you wont eat them all before anyone else even gets a look in, hell I almost didn’t get the pictures taken. I use a pack of bread mix, it makes this recipe really easy and it’s the perfect amount of dough too, but you could make the dough from scratch if you want to.

In all seriousness these are prefect to take to work or make a great lunchbox treat for the small fry’s to take to school. Just don’t blame me when at 3am you find yourself in the kitchen rooting through your child’s lunchbox….

Pizza Buns
Makes about 12

500g pack ciabatta bread mix, I like Wrights, it always works.
Oil for greasing
About 300g tomato sauce, make your own (I did, obvs) or use ready made pasta sauce or passata if you like. Decisions, decisions.
abut 200g Mozzarella cheese, controversially I use the one that comes in a big lump, think it’s called mozzarella pizza cheese. I wouldn’t normally BUT this is better than the balls of mozzarella as they are quite wet and make these buns a bit soggy. 
Grated parmesan, about 25g
Fresh basil, oregano, chilli flakes, sea salt and pepper
Toppings:
You can leave them as they are or add whatever toppings you like, I went for ham and sweetcorn but try tuna, olives, anchovies, capers, sundried tomatoes, fresh chilli, spinach, pepperoni (you get the picture) Don’t overfill though or they wont roll up…

1 Make up the dough following packet instruction, knead for 5-10 mins, then leave in an oiled bowl, covered with oiled cling film (or I use a clean shower cap) in a warm place, until doubled in size. About an hour.

2 Get all your toppings ready now, I grate half of the mozzarella and cut the other half into cubes, so you get the odd pocket of melted cheese.

3 Roll out the dough to a rectangle shape, on oiled non-stick paper as big as you can get it without the dough being too thin. Spread on the sauce then scatter on toppings, cheese first. Roll up from the longest side upwards, use the paper to help you get it really tight, seal the ends with some oil to help them stick.

4 Using a sharp oiled knife trim the very ends then cut into about 12. Oil a pizza tray and a small sandwich tin and arrange the rolls in a circle, with one In the middle. Cover with oiled cling and leave in a warm place, until the have grown about ½ as big again, about 45 mins.

5 Heat oven to 220C/200C fan/gas 7. Put in the oven, then turn down to 200C/180C/gas 6 and cook for 14-16 mins, until puffed up and golden. Allow to cool a little before eating (if you can, good luck!)


Friday, 4 October 2013

What came first; the chicken or the egg noodle?

Is it just me or has someone turned the heating off? Over the last few days I’ve definitely detected a slight chill in the air; the nights are drawing in and my motivation to leave the house of an evening is seriously waning. These chilly times leave me craving my over the knee socks and a bowl of something warm, comforting and filling on my lap. Sometimes simplicity is best; as much as I love trying out new, interesting flavours and recipes I will always come back to the classics, such as my recipe for chicken noodle soup. Exciting and innovative it may not be but the classic flavor combinations work so well together that it really does taste like happiness in a bowl. It’s also on the official list of cures for man flu….fact…what more could you hope for?

Sometimes I think I might be slightly addicted to soup. As addictions go, I guess it’s not such a terrible one to have, in my 28 years on this Earth it’s yet to get me into any kind of trouble. In fact, I think soup addiction should be encouraged here in the UK, especially during the winter. I think a bout of widespread soup addiction would boost the morale of the nation through these long, cold winter months. So, lets all get addicted to soup this winter, make a facebook page, hashtag the hell out of it on twitter, buy a t-shirt, most importantly make a pot of soup…

This is one of my favourite soups to make (quite the claim from an avid soup maker). Not only is it souper delicious (see what I did there) it’s also healthy and pretty cheap to knock up too. I make a massive batch and freeze whatever I can’t eat throughout the week. It means I’ve always got a portion or too on standby for a speedy supper or lunch. What’s more, I’ve yet to find anyone who doesn’t enjoy this soup (apart from maybe vegetarians) even the fussy little nippers I’ve cooked it for have tucked in with glee - it really is a guaranteed crowd pleaser. The Mother is always straight round when she hears there is a pot of this on the go.

NB. If you get bored of this soup halfway through the batch (this isn’t actually a real thing that could happen) or just fancy a change of flavor then add a couple of tbsp each of soy sauce, rice wine vinegar and sweet chilli sauce to this along with the juice of a lime and a chopped fresh chilli too, if you like it hot. Finish with a handful of fresh coriander leaves and you have an Asian inspired bowl of goodness.

Enjoy and have a lovely weekend!

Nevs old fashioned chicken noodle soup
Makes about 8-10 portions, depending how hungry you are

FOR THE BROTH
1 large chicken, mine weighed just over 2kg’s.
1 carrot, roughly chopped- all the veg in this bit are roughly chopped actually, save me repeating myself.
1 leek
1 onion
2 celery stick
about 10 peppercorns
3 bay leaves
1 head garlic, halved through the middle, skin left on
few sprigs thyme and parsley leaves
1 chicken stock cube (I use the knorr chicken stock pots)
Good splash white wine, if you have some open
FOR THE SOUP
1 large carrot, diced (mine was well LARGE, see pic)
1 large leek, finely sliced any dirty bits discarded but use the whole leek, not just the white parts, the green bits have feelings too you know.
2 heads corn, kernals removed or a large handful frozen sweetcorn, about 250g
3 bundles thin egg noodles
fresh parsley, chopped

1 Put all the broth ingredients, along with a good pinch of salt, in a large pan. Cover with cold water, about 2-3 litres. If you have a pressure cooker, use this, it will take 30 mins on high pressure, then release slowly. If you don’t have one, get one. No, just joking, bring up to a simmer, then cover and simmer gently for about 1hr 45 mins, until cooked through, adjusting the time if your chicken is slightly smaller or larger.

2 Remove the chicken and allow to cool slightly. Strain the stock into a couple of jugs or a big bowl. You want to let it cool to room temp then get it into the fridge so the fat can solidify and you can remove it all. I do this the day before and leave it overnight. It means you can literally just spoon of the layer of solidified white fat, leaving you with a crystal clear, jelly like chicken broth that’s virtually fat free and full of chicken flavor. If you try and get the fat off before, you’ll lose loads of the broth, and that isn’t a good thing. Remove the skin and bones from the chicken and shred the meat. Set aside in the fridge until ready to make the soup.


3 This is the easy bit! Put your veg and stock in a pan, bring up to the boil then turn down to a simmer, cover and cook for 10 mins, or until the carrots are soft (this will depend on your adaptation of diced). Add the chicken, noodles and most of the parsley, season, It will need a good amount of salt and pepper here, so keep tasting and adjusting till the flavor is good. Turn off the heat but leave on the hob with the lid on for 10 mins. The noodles will soak & soften and the soup will cool from mouth burningly boiling to edible. Serve with the rest of the parsley sprinkled on top, I made some baguettes to go with it, but you don't really need bread. Divide any leftovers into individual portions and keep in the fridge for up to 3 days or freeze for up to 6 months. 


Friday, 27 September 2013

The Cod Dog


Well it’s been a while. The trouble with actually having a summer here in the UK is it’s hard getting anything that’s not 100% essential done. Why would you when the sun is shining and there is fun to be had in the great outdoors? Alas as autumn rears its less attractive head I decided it was time. Time to focus and return to the blog….so, in the words of Take That; Babe, I’m back again.

I was thinking perhaps a good way to bridge the blog gap would be to cast my mind back to the food highs and lows of the last few months and create a recipe that epitomised the summer for me. But where to begin…..over the past few months I’d literally consumed hundreds of mouthfuls, meals and snacks. At least now, being one of those annoying people who take a picture of everything they eat, I had something to jog my memory.

I began to reminisce about recent food enjoyed alfresco; The laughter that accompanied more than a few portions of chips and curry sauce….always on Whitstable beach, always washed down with a plastic cup of Prosecco.  The taste and smell of just caught, then chargrilled fish eaten on a deserted beach in Portugal.  A hell of a lot of pizza too, naturally.

I started thinking about an occasion that really bought home this summer for me, surely it had to be the BBQ, and the place I had spent most time at this summer? Now that I had returned to Kent from London, it was definitely the beach. A sharp contrast to last year; where hot days off would be spent lounging in one of the capitals lovely parks or clustered with friends on a scrap of pavement outside a sunny central London pub.  

At pretty much all the BBQ’s I had been to there had usually been a banger of some description on offer. From the simplest of affairs cooked on a disposable grill to an elaborate Dad-manned-gas-BBQ-get-up, you were getting a hotdog. That, I’d put money on. But while my love for the sausage was strong I couldn’t neglect all the wonderful fish and seafood and the many hours I’d been lucky enough to spend beside the sea this summer.

I had to combine to two. Hello beach, please meet BBQ, and so it emerged, the fish dog. I’d had a one before from a street food van aptly named Hix’s FishDog(see what they did there). But I would create my own, with added brilliance, of course. It would essentially be a pimped up version of the fish finger sandwich. I wanted mine to be special though, a thank you to such a great summer 2013 and one that even the legendary Captain Birdseye would be proud of. A meal in itself, that was easy to eat and would remind me of those summer days long after sunset. Thus the emergence of (drumroll please)…. The Cod Dog.

So here’s my reminder of the long, hot, sensational summer of 2013. I am sure the next year will be just as good and besides we have the promise of delicious mulled wine to get us through the upcoming chillier weeks with rosy cheeks and a smile.

Lucy’s Cod Dogs
Takes about 45 mins Makes 4

FOR THE FISH DOG
4 cod loins, or fillets, skinless (about 125g each)
50g each panko breadcrumbs and cornflakes (yes you read correctly, cornflakes, not crunchy nut please just the old school one’s, they give a great colour and texture too.)
1 large beaten egg
2 tbsp flour
FOR THE SALT & VINEGAR CHIPS
2 medium potatoes, sliced about ½ cm thick, no need to peel
2 tsp malt vinegar, plus a splash more
salt and sunflower oil
chopped fresh dill (if you are putting it in the sauce anyway)
FOR THE TOMATO TARTAR SAUCE
2 heaped tbsp. mayo or light mayo if you should prefer
1 heap tbsp. ketchup
1 tsp chopped dill
about 1 tbsp chopped red onion
1 small cornichon, chopped (optional) I can hear the complaints already about this, so just leave it out if you like but it does go well!
About ½ tsp vinegar, from the cornichon jar, if using.
TO SERVE
Pack 4 sub rolls, I used M&S ones (I decided not to make the bread as for ease of eating it needed to be really soft, white and larger than your average finger roll and I think homemade bread often is a little too crusty in texture. I settled on this M&S sub roll, which I knew from experience, was a keeper.)
8 slices mild cheese
Handful shredded iceberg lettuce

1.Pat the fish dry. Put the crumbs and cornflakes in a food bag, seal and bash with a rolling pin. Not too fine, a bit of texture is good! Arrange on a plate. Dust each fish in flour, then season and dip in egg then coat in the breakfast crumbs. Repeat then asset aside on greaseproof paper in the fridge while you get on with the other stuff.

2 Heat oven to 220C/200Cfan/gas 7. Line a tray with parchment and drizzle with oil and salt, put in the oven. Put the potatoes in a shallow microwaveable dish with some salt, the malt vinegar and then cover with cling film and pierce a few times. Microwave on full power for 5 mins, shaking half way. Arrange in a single layer on the preheated tray, drizzle with more oil and salt then the extra malt vinegar. Cook for 30 mins, turning half way then sprinkle on the dill and cook for 5 mins more. 

3 Heat a shallow layer of oil until hot in a frying pan, cook the fish for about 3-4 mins each side, until golden brown and cooked through. Drain on kitchen paper and season with salt.


4. Meanwhile mix all the sauce ingredients. Split the rolls; add a dollop of sauce too each and spread. Add the cheee, some lettuce and a few potatoes and finally the cod dog. Eat! While this is really tasty eaten when the fish is piping hot, left to cool to room temperature it’s also good too. So why not make a batch and head down to the nearest beach for a blustery walk!


Monday, 5 August 2013

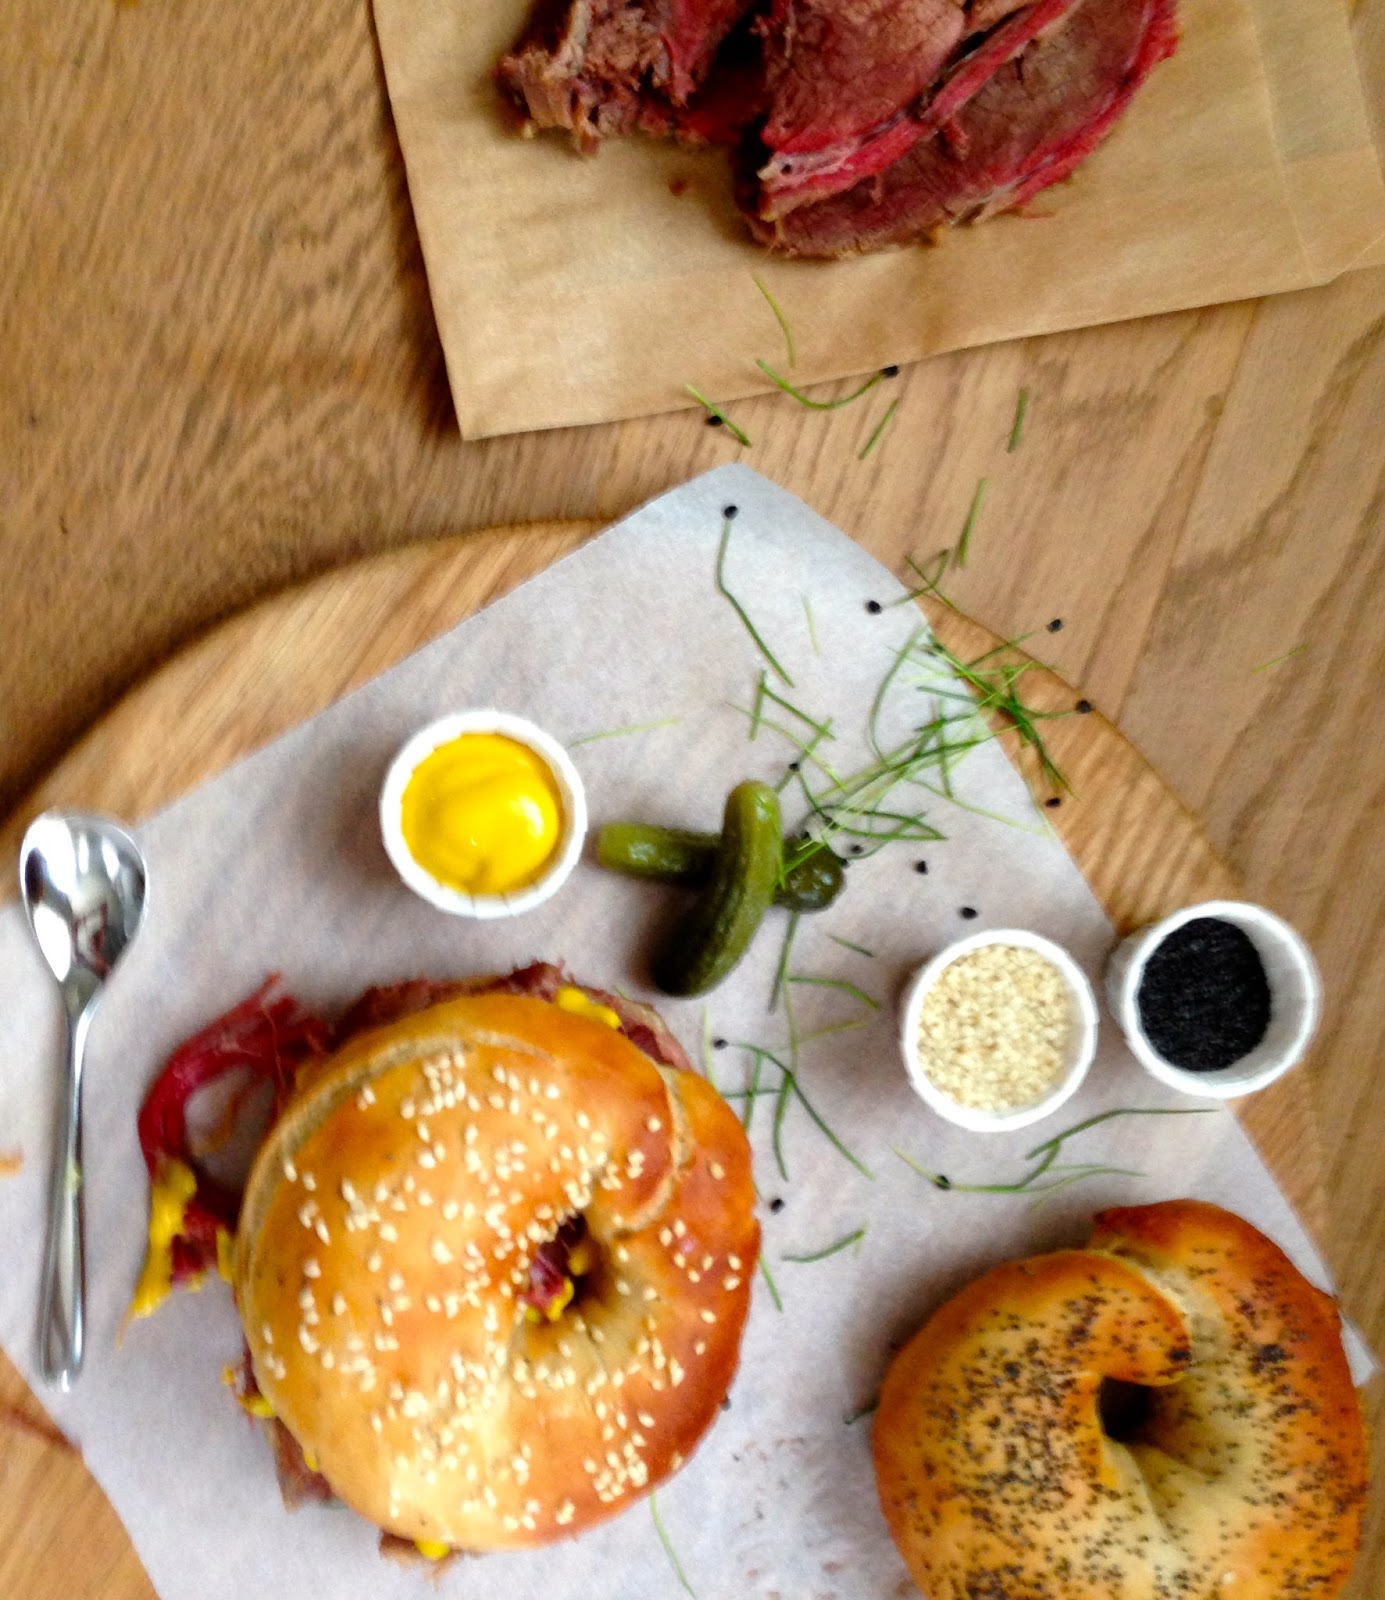
Salt beef bagels

One of the things I miss most about my time in the big smoke now I am a country gal is the ability to chow down on an amazing salt beef bagel whenever my stomach and heart desires it. A quick scoot down Brick lane and I would be rewarded with the finest of handheld snacks known to man, the salt beef bagel. I am particularly fond of food one can consume with the hands while standing up. Anyone who knows me will know I’m a bit of a spiller….standing vertically while eating greatly increases the chance that the food wont fall on me, but instead on the floor. This is a definite bonus.

Not one to let location get in the way of what I want I decided to make my own salt beef. The only problem, it was going to take a while. Once I’d made up my mind and written a recipe the beast was going to need a sweet and salty bath for at least a week. This was annoying for me, and each day when I opened my fridge and saw the bathing brisket I got a little more impatient. It felt like the longest food foreplay ever.

Day 1 I was mildly irritated, by day 3 the beef appeared in my dream and by day 6 I’d had to stop going to the fridge all together for fear of cutting of a raw chunk and eating it straight from the brine. This was a bad week, it felt like waiting for Christmas as a small child, where hours became days and you felt as if the fat, red suited chap was never going to appear.

Alas, day 7 had finally come…I had a fitful nights sleep that evening and had to force myself not to get out of bed at 5am. Then the food fear set it, had I built this up way too much in my head? Would it just be average? I didn’t think I could handle the disappointment however I soldiered on with an increasingly rumbling stomach. I needed to make the bagels too, but the beef was so big it was going to need a good few hours cooking so I decided to get those done in the waiting time. It would be a good distraction.

This recipe is definitely worth a go, even if you don’t like bagels (erm…what’s wrong with you?!) Roast it up and eat it as you would a joint of beef. It’s super tender and tasty from the weeklong soaking and it’s also a great value cut of meat. I paid about £15.00 for a 2kg piece, it was literally a beast, a beast I tell you!!!! It will easily go round the whole family with lots of lovely leftovers for sandwiches!The Mother even loved hers, and she "doesn't like salt beef bagels" (as if that's a real thing)....

Salt beef
Makes LOADS

FOR THE BEEFY BATH
About a 2kg piece of beef brisket, you’ll probably need to ask for this, you won't get in the supermarket aisle. The nice butcher man at Morrison’s sorted me out with some from out the back, so maybe go there.
350g flakey sea salt, I used Maldon sea salt
250g dark soft brown sugar
a few bay leaves
1 tbsp yellow mustards seeds
1 tbsp juniper berries, crushed
1 tbsp black peppercorns
good few springs fresh thyme
1 dried red chilli
about 2 litres of water
a can of coke (full fat, try and get the one with Lucy written on it if you can)
50g saltpeter (you don’t actually have to use this, it gives it that lovely pink colour but you have to get it online in quite a large quantity and the postman might think you’ve just received a shipment of drugs, which is never good)
FOR THE COOKING BIT
1 carrot, cut into chunks
1 onion (skin on) cut into quarters
1 leek, sliced into chunks
a couple of mushrooms (if you have them anyway)
handful parsley or thyme or both
2 bay leaves
head garlic, halved through the middle

1 Add all the ingredients for the brine (apart from the beef) into a large saucepan (you need a big one, don’t do that thing where you think it will fit in the smaller one, as the bigger one takes longer to wash up, then end up pouring it into the bigger one anyway…I of course didn’t do this….) Heat gently stirring until the sugar and salt have dissolved then bring up to the boil and turn of. Leave until cool. You need it cool or it will start to cook the beef.

2 Stab the beef all over with a skewer so all the nice briney goodness can get all the way through. Transfer to a non-reactive container (not metal) and pour over the brine. The beef annoyingly now will stay put for a few seconds then float up to the top. You don’t want this to happen so will need to weigh it down. I used a multipack of juice drink cartons, because that’s the first thing my eye saw but use whatever works. Cover. Chill for 7 days. Watch, pine, become obsessed or just carry on with your life like a normal person would.

3 You need a big pan to cook this now, so maybe borrow one, Nan’s always seem to have giant pans, or aunties. I am an auntie so by definition I own giant pans now. So anyway put all the veg and herbs in the pan, cover with cold water. Bring up to a simmer and gently (you just want small bubbles PLEASE do not boil the beef you have looked after so lovingly) cook for about 3 hours, the meat should shred easily when tested with two forks, if not give it another 30 mins and check again.

4 EAT IT, in a lightly toasted bagel with pickles and mustard (if you like) and be happy for the whole day!!!!